On-demand 3D file generation: the process
In this article, we’ll detail the entire process that leads to the publication of a new template on iteration3d.
The steps are numerous and varied. We’ll use the template Enclosure with screw-mounted lid as an example to explain the approach. And we’ll assume that we already know we want to make an enclosure.
Define the contours of the "idea"
The first step is to define the boundaries of the idea. This is one of the most complex phases and one that consumes a lot of human brainpower. Let’s assume we want to publish a template for an enclosure (this decision already being the result of some reflection…).
Alright, now the trouble begins. What type of enclosure? A simple box with a lid placed on top ? Should the lid be screwed or snapped on? Do we want a hinge system? Should the enclosure be watertight?
We could go on listing all these choices to be made. Because choices must be made. One of the strengths of the iteration3d platform is that it gives the user the ability to make those choices. So we might decide to let the user define the length, width, and height of the enclosure, but also the fastening system — screw, snap, or hinge!
However, it's important to limit those choices to streamline the user experience. If the abundance of options leads to a customization form with thirty fields, there’s a good chance the experience will fail due to the complexity of decisions the user has to make — especially since some of those decisions often depend on others!
In short, you get the point. And this preparatory work — even before writing a single line of code — is crucial. You need to define the scope of the project without falling into a minimalistic template that would lose all its interest.
It's settled: we'll make an enclosure with a screw-mounted lid!

Choose the parameters and set their limits
Now that we know where we’re heading, it’s time to determine what the user will be able to control — what we’re giving them control over. Once again, human reasoning (maybe helped by a bit of non-human intelligence) must prove itself.
Some parameters are self-evident. How could we offer on-demand 3D generation of an enclosure without letting the user choose its length, width, and height? Obvious enough. But should we allow a user to generate a 2-meter-long enclosure? Why not, you might say? Fair question — but this time, it’s the platform’s role to make decisions. Since iteration3d is primarily designed to generate 3D files intended for 3D printing, it wouldn’t be totally absurd to allow such a long enclosure — but it does start to lose meaning. That’s why the customization form will “cap” the length field to a range such as 10 to 500 mm, for instance.
You also have to consider the limitations of 3D printing. For example, a 0.40 mm wall in FFF (fused filament fabrication) 3D printing is hardly feasible.
As you’ve understood, this phase is about identifying all the parameters the user can act upon, and their limits.

Code the template
As explained in the article How are 3D files generated?, the models published on the iteration3d platform aren’t designed using traditional CAD software — they are coded. The platform’s generation engine uses the build123d library, which is based on the Python programming language.
This phase is therefore about coding the model and defining variables that will take the values entered by the user on the site.
We won’t go any deeper here, but it’s clearly a crucial phase.
Validate user input
Once again, we’re talking about code. Rule number 1 of every good programmer: never trust the user. That might sound a bit harsh, so let’s explain. Just because you ask the user to enter 1 or 2 in a field doesn’t mean they won’t type 3. If the following actions depend solely on values 1 or 2, you’ll run into issues (a.k.a. a bug!).
Even well-intentioned users can make mistakes — it’s human. So every computer program must, first and foremost, validate the user input.
That’s the role of the on-demand generation pages. When the user submits a request, the server checks the consistency of the data. This step is also very important.
We won’t go into the security measures required to protect the system from bad actors, such as bots or malicious users…
3D print it
The template is now coded, and the necessary validations are in place. We can now launch the first tests of enclosure generation.
It’s time to compare theory with practice — as always.
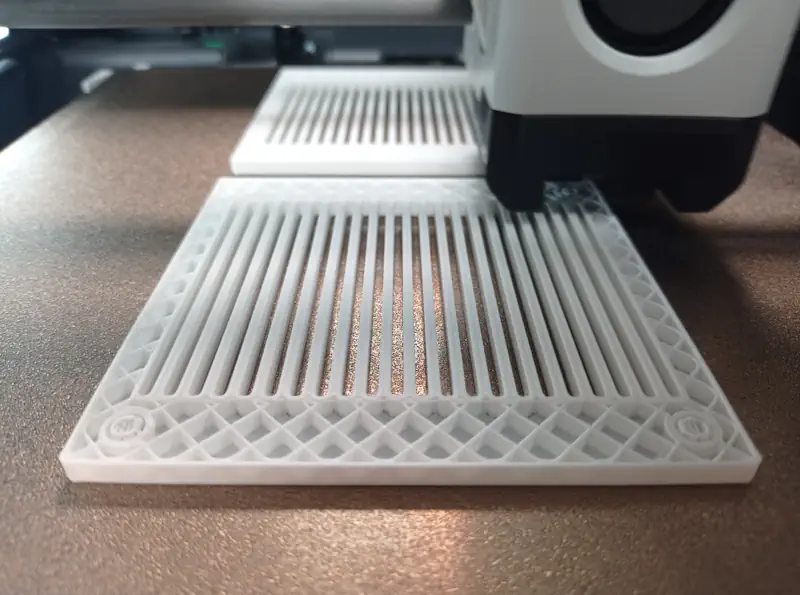
In our case, this means 3D printing the first models produced. This allows us to verify that the final dimensions are as expected. For this specific enclosure, we need to ensure the two parts fit together properly.
These first prints can also help illustrate a blog article, for example.
Spread the word
That’s it! Or almost. Because now it’s time to make the newly created template known. And in the end, this might just be the most important step.
Now it’s your turn to share it with the world!